Wednesday 28 November 2012

Configuring IBM Cognos 8 and Cognos 10.1.1 to use NTLM Namespace

IBM Cognos components can be configured to use the Microsoft windows operating system native security i.e. NT LAN Manager (NTLM) as the authentication source.

Step 01) Open IBM Cognos Configuration on the machine where Content Manager(CM) is installed. In the Explorer window, under Security, right-click Authentication, and click New resource, Namespace. 

Step 02) In the Name box, type a name of your authentication namespace. In the Type list, choose NTLM and click OK. 

Step 03) The new authentication provider resource appears in the Explorer window, under the Authentication component. In the Properties window for the NamespaceID property, specify a unique identifier for the namespace ID. Specify the values for all other required properties to ensure that IBM Cognos components can locate and use your existing authentication provider. Here ENT is taken as NTLM domain name.

Step 04) From the File menu, click Save. Test the connection to a new namespace. In the Explorer window under Authentication, right-click on myNTLM and click Test.


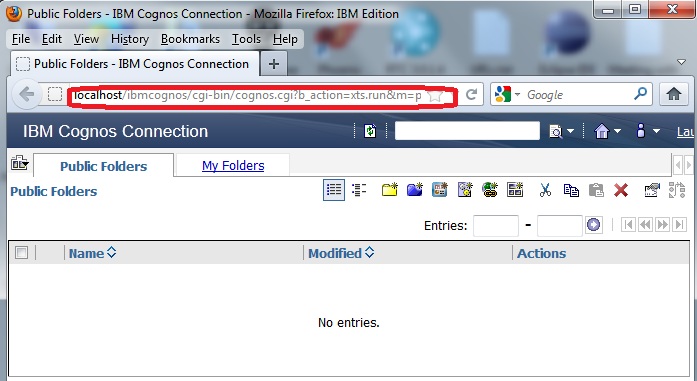
Step 05) Open Cognos Gateway URI in a web browser. It should prompt for authentication. The credentials used for windows machine authentication will work here.


Monday 26 November 2012

Steps to increase zFS File System size dynamically in the WebSphere Application Server (WAS) on zOS

The 'zFS' stands for zSeries File System. It's newest Portable Operating System Interface (POSIX)-style hierarchical file system for IBM's z/OS operating system. The zFS as a separate entity was initially released as PTFs (patches) for z/OS 1.2.
But now the zFS is included as a standard feature beginning with z/OS 1.3.

Step 01) Go to bin directory of WebSphere Application Server(WAS) base installation
Look for 'zCreateConfigFileSystem.sh' script at given locations-

/WAS800/zWebSphere/V8R0/bin  (For WAS8)
/WAS850/zWebSphere/V8R5/bin  (For WAS8.5)

Step 02) Edit 'zCreateConfigFileSystem.sh' script
Add EXTADDR parameter in the script as shown below in the red colour-

# ZFS configuation file system requested
else
        # Define vsam linear data set
        printMessage CWLCS0023I "$fileSystemName"
        if [[ -z "$volume" ]]; then
                zfsadm define -aggregate "$fileSystemName" -cylinders "$primaryCylinders" "$secondaryCylinders" -dataclass EXTADDR
        else
                zfsadm define -aggregate "$fileSystemName" -volumes "$volume" -cylinders "$primaryCylinders" "$secondaryCylinders" -dataclass EXTADDR
        fi

Step 03) Save the script file.
Now whenever ZFS File System will fall short of size, it will dynamically grow in size to to accommodate as per the new requirements.

Wednesday 7 November 2012

Configure Microsoft IIS web server for IBM Cognos 10.2 on Windows7 platform


Step 01) Configure an Application Pool

1) Go to Start > Administrative Tools, right-click on Internet Information Services (IIS) Manager and select Run as administrator.


2)Expand on the <server name> which is located under the Start Page, then expand on Application Pools.
3)Click on "Add Application Pool..." from the "Actions" pane on the right side.


4)Provide the required details in the New Application Pool dialog.


5)Click OK
6)Now back to IIS Manager's left explorer pane, select the newly created Application Pool and click Advanced Settings under Edit Application Pool within the Actions tool pane on the right.


7)For 64-bit installs of IIS, select the "Enable 32-bit Applications" setting and set the value to "True".
And change the "Start Automatically" setting to "True".


8)Click OK
9)Go to IIS Manager's left explorer pane select the newly created application pool and click Start under Application Pool Tasks within the Actions tool pane on the right.


Step 02) Create The IBM Cognos 10 Virtual Directory
 
1)In the IIS Manager's left explorer pane, expand Sites and Default Web Site.
2)Right-click the Default Web Site and select Add Virtual Directory.


3)Provide the required details for the "Add Virtual Directory" dialog. And press OK to save the changes.


Step 03) Create An Application for cgi-bin

When an IIS Application for cgi-bin is created it will map the IBM Cognos gateway modules to the application pool created earlier.

1) In the IIS Manager's left explorer pane find the virtual directory "ibmcognos" created earlier. Right-click on the virtual directory and select Add Application.


2)In the Application pool: field, select the application pool created earlier i.e "IBM Cognos 10" by by clicking on the "Select..." button. 
And press OK to save the changes.


Step 04) Configuring IIS 6 for IBM Cognos CGI

1)Select the "cgi-bin" application from the Default Web Site > ibmcognos tree in the left pane of IIS Manager. Select the "Features View" from the lower bar in the middle pane.
2) Look for "Handler Mappings" in the middle pane.


3)Double-click on "Handler Mappings" in the middle pane.
This will bring up the list of handler mappings for this application in the middle pane.
In the upper right Actions pane, click "Add Module Mapping" to add the CGI mapping.


4)Provide the required details for the Add Module Mapping dialog.
Request path: specify "cognos.cgi"
Module: select "cgiModule" from the dropdown list.
Executable (optional): field should be left blank.
Name: module name such as IBMCOGNOS-CGI


NOTE- If you can't see 'CgiModule' in the above Module drop down. Then please install CGI module in IIS web server on your machine.
Please refer below link-
http://www.iis.net/configreference/system.webserver/cgi

5)Click OK to save.
6)Go back at the "Handler Mapping" page, "IBMCOGNOS-CGI" should appear under the Enabled section.


7)With the newly created mapping i.e. "IBMCOGNOS-CGI" selected, click "Edit Feature Permissions" from the upper right Actions pane.
8)In the "Edit Feature Permissions" dialog, check the "Execute" checkbox to enable CGI execution.

9)Click OK.

Step 05) Setting the CGI Restrictions for the Web Server

1)In the IIS Manager, select the web server in the tree view on the left and in the content pane select the "Features View" tab at the bottom. Look for "ISAPI and CGI Restrictions" feature.


2)Double-click on the "ISAPI and CGI Restrictions" feature. This will bring up the list of defined restrictions in the middle pane of IIS Manager.
3)In the upper right Actions pane, click Add...


4)Provide the necessary details in the "Add ISAPI or CGI Restriction" dialog.
-In the ISAPI or CGI Path:  give complete path to the "cognos.cgi" file
-In the Description: specify a description of the restriction like "IBMCOGNOS-CGI" -Make sure that the check-box for "Allow extension path to execute" is checked
-Click OK


Step 05) Testing the CGI installation
-Open Cognos Gateway URI "http://<webserver>/<alias>/cgi-bin/cognos.cgi" in a web browser. It should get opened properly.
For example in our case it is- 
http://localhost:80/ibmcognos/cgi-bin/cognos.cgi 


Thursday 1 November 2012

Enable WebDAV for use in IBM Cognos Report Studio

In order to insert a logo or image in the IBM Cognos Report on Red Hat Enterprise Linux (RHEL) platform, a customer needs to enable WebDAV on HTTPS server.

What is WebDAV?
WebDAV stands for Web Distributed Authoring and Versioning (WebDAV) is an extension of the Hypertext Transfer Protocol (HTTP) that facilitates collaboration between users in editing and managing documents and files stored on World Wide Web servers.

How to enable WebDAV on HTTPS Server?
01) Open 'httpd.conf' file present at path something like "/opt/IBM/IHS/HTTPServer/conf". Uncomment these 02 lines-
LoadModule dav_module modules/mod_dav.so
LoadModule dav_fs_module modules/mod_dav_fs.so

02) Go to Virtual Hosts section in 'httpd.conf' file.
Add these entries-
<VirtualHost *:80>
     Alias /image "/opt/ibm/cognos/c10_64/webcontent/samples/images"
         <Directory "/opt/ibm/cognos/c10_64/webcontent/samples/images">
             Options Indexes FollowSymLinks
             AllowOverride None
             order allow,deny
             allow from all
             AuthType Basic
             DAV On
         </Directory>
</VirtualHost>

03) Save and re-start HTTPS server.
04) Give necessary permission to the webcontent, sample and images directory.
05) Open a report in IBM Cognos Report Studio.
Go to Toolbox and drag 'Image' to right side.
Now click on the Image and give web URL-
http://<server IP>:80/image/pic1.jpg

06) Save and run the report. The logo/images will be reflected in an existing IBM Cognos Report Studio Report.